DIY: How to Crochet a Rag Rug
 I have been lugging around a bag of old sheets for years. From closet to closet--across state lines, even. I had the idea that someday I'd like to try my hand at making a rag rug.
Well, I've finally bit the bullet. You look at a rug and think it's going to be a big, long-term project -- about on par with an afghan. But it's actually going a lot easier and quicker than I expected! Ripping the sheets and turning them into "yarn" actually seems like the most time-consuming part of the process.
What I'd really like to do is arm-knit one of those amazing-looking, trendy, chunky blankets. But the material for those is expensive. So hey! Let's do this free stash-whittling project instead, right? Also, our floor is kind of cold and un-insulated, so I was thinking two small rugs on either side of the bed would be pretty great to have on these chilly mornings.
I'm guessing you probably have some threadbare, unnecessary sheets laying around in some closet or other, so you can join me!
For these rag rugs, I'm using some twin-sized blue and white sheets that I rescued from a box my parents were sending to the Goodwill. Larger items make for longer strips of material -- longer strips make for less joining. So bed sheets are ideal! You can use pretty much anything, though. Sheets, towels, t-shirts, para-cord, plastic grocery bags....You really just need to have a lot of the same kind of material.
Instructions
To begin with, you need to turn your material into "yarn" Start by tearing it into strips. For mine, I'm tearing my sheets into strips about 1.5-2 inches wide and using a size Q crochet hook (like this


Once you have a pile of strips, you'll want to join them. A lot of people advocate sewing the strips end to end, but I'm going to share a no-sew method. Because I'm lazy like that. It's a little bulky to crochet around the joins, but I haven't found it that bothersome, and I'm just pushing the "lose ends" to the back of the rug.
Okay.
So first, you will hold two strips together, one in front of the other. Fold them both over about an inch, then cut a small slit through the fold.
Unfold them, but keep them together. You should have created a buttonhole like slit through both strips.
Now, take the tail end of the front strip and pull it through the slit back to front. This is important, because if you pull it through the wrong way it will just pull all the way through when you tighten it.

Pull the strip all the way through both slits and tighten -- you should end up with a tight little knot of sorts like so. Wind your strips into a ball as you join. It goes pretty quickly once you get the hang of it

Here's what it looks like when you go around the bed for the first time...

Basically, you'll keep going around and around and around until you reach the size you want. Throw an extra stitch into the three stitches at each end of the oval--this will add six stitches per round--to keep it from curling up on you. Then when it's as big as you want it to be, slip stitch to finish!
 |
| Oh, cats and yarn.... |
Now about switching colors.....
It's not that hard. Make a slip-knot in your new color, and then when you go through the stitch to draw up a loop, just draw up that slip-knot. Yarn over with the new color, and pull through. I cut off the old color with a couple inches of tail, and then crochet it in the next time I come around.


And that's all there is to it! Since the stitches are so large, it goes pretty quickly. I have hardly worked on mine since the day I started, but here's where I'm at. . . Really, it would just take a few more rounds.....


Comments
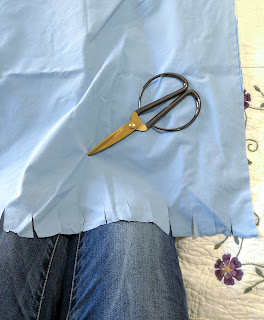
She folded the sheet in half the again in half, then cutting the 4 open corners to round off the edges. When the sheet is unfolded you end up with a oval sheet more or less. Continue around the oval in 1" or so line, ending up in center of sheet.
Roll in ball and you are good to go.
Loss track of video but have used this method with great success.
Post a Comment